Send the buyer to a Laces checkout page and back to your site. No payment UI to build; works on a static site.
Hosted checkout is the quickest integration. Your page creates a checkout
session for an event, sends the buyer to the Laces page it returns, and gets
the buyer back when they finish. Laces handles the form, the waiver and the
payment: mobile money (MTN and Airtel) today, card coming soon.You need: an API key with Start hosted checkout
(checkout_sessions:write), your site’s origin in Allowed domains and in
Return URL domains. See Getting your API keys.
Every key, token and id on this site is a made-up example value. Your real
keys are issued to you in the Laces app, under Settings → Developers.
Your page creates a session: POST /checkout-sessions with the
event and your two return URLs. From the browser, use the publishable key.
From your server, use a bearer token.
Laces returns { id, url, expires_at }, where url is
https://laces.run/checkout/{id}.
Redirect the buyer to url.
On laces.run the buyer sees a registration form for exactly that event,
with your prefill filled in and a “Cancel and return to
your organization” link. They fill it in and pay.
Cancel sends them to on_cancel_url.
Success shows a confirmation with a “Return to your organization” button
and redirects automatically after about 5 seconds to on_success_url,
carrying the session id.
Your server verifies the session before fulfilling anything.
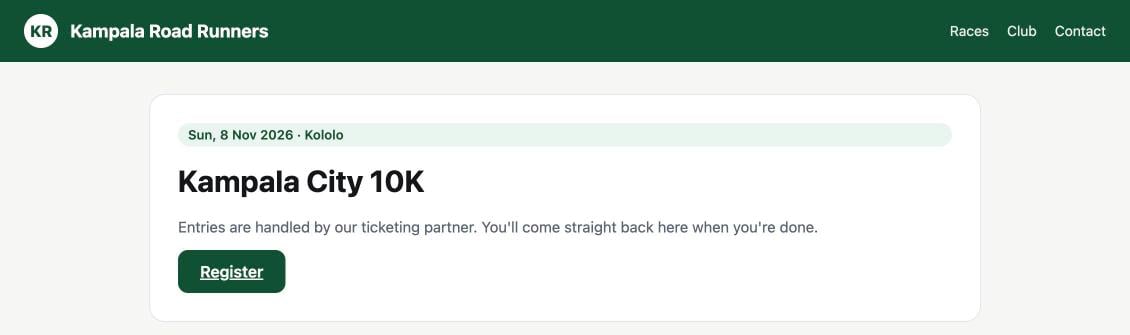
A partner's event page with its own Register button. The example site and race are made up.
2
The Laces checkout form
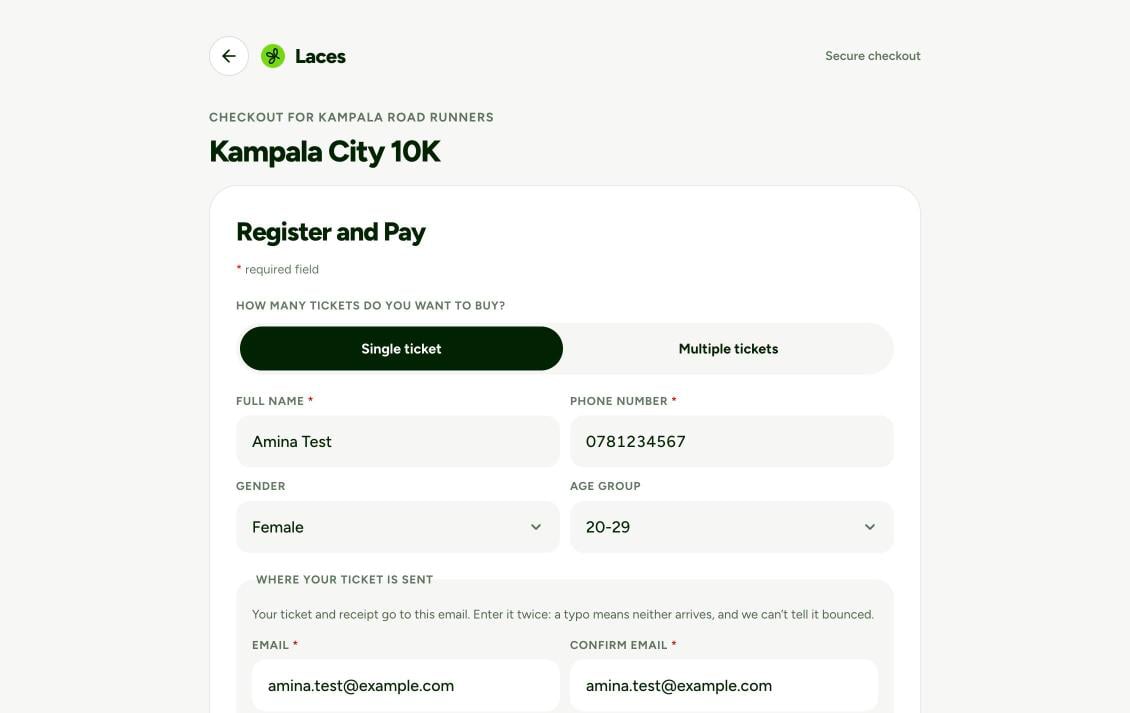
Laces opens the form for exactly that event, labelled with your
organization’s name. Anything you sent in prefill is already filled in.
The hosted checkout form, with the buyer's details prefilled.
3
Pay with mobile money
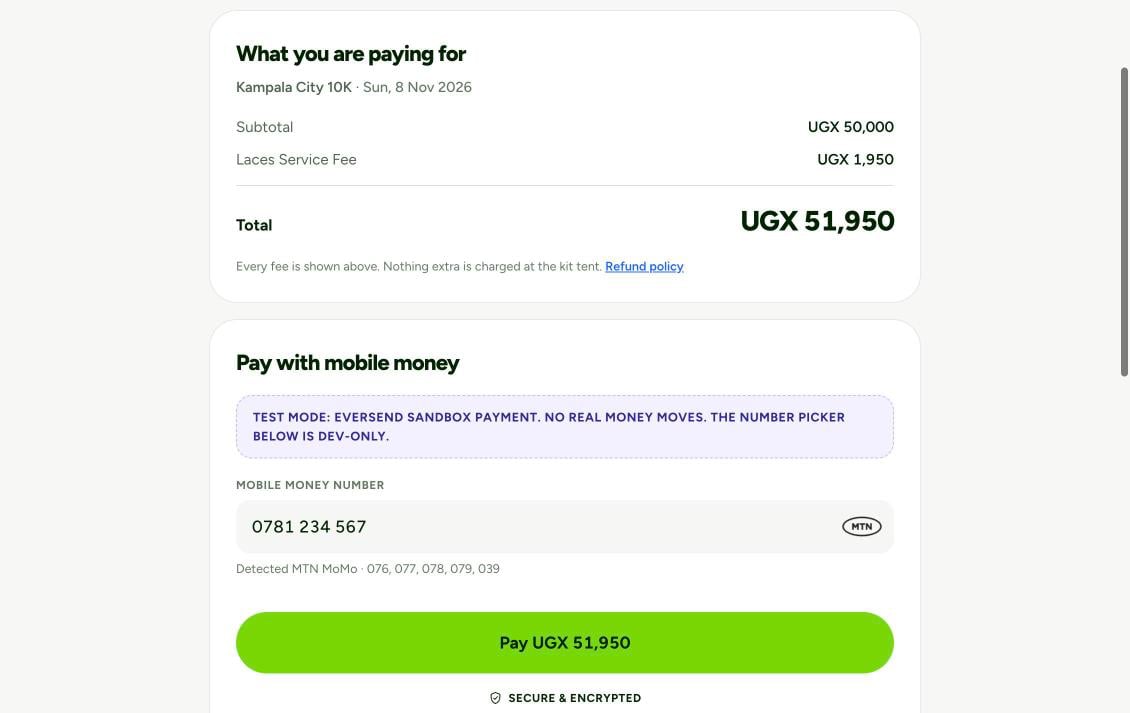
The buyer sees every fee before paying, enters their MTN or Airtel number
and taps Pay.
The payment step. This screenshot was taken in test mode, which is why it shows a sandbox banner; live checkouts don't.
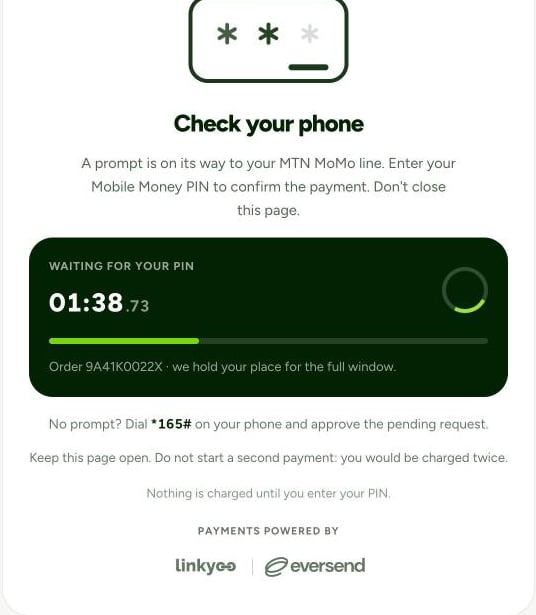
A prompt then arrives on the buyer’s phone, and the page waits while they
enter their PIN.
Illustrative: the waiting screen while the buyer approves the prompt on their phone.
4
Confirmation, then back to you
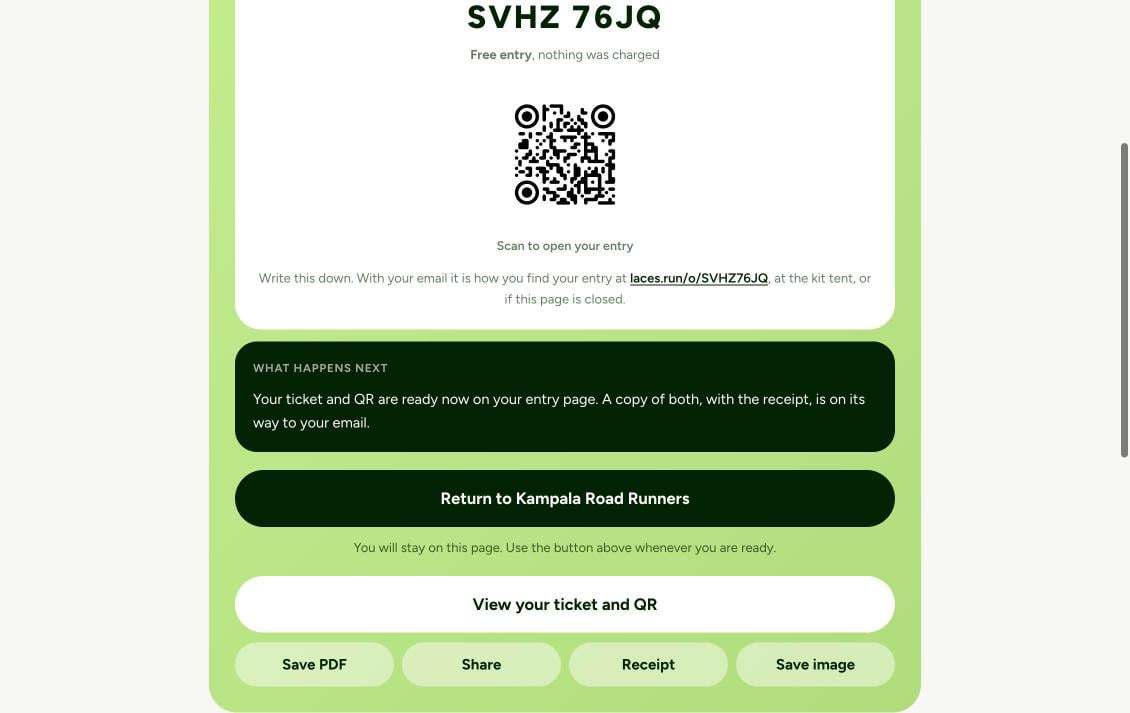
The buyer gets their order code and ticket, and a Return to button labelled with your organization’s name. Laces sends them back to your on_success_url
automatically after about 5 seconds.
The confirmation (shown here for a free entry) with its Return to button.
5
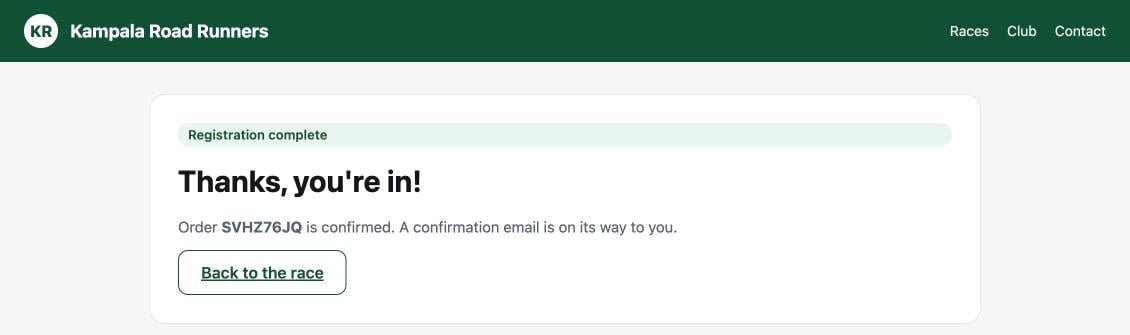
Your success page
Your server verifies the session (step 2 below) and shows its own
confirmation.
Both URLs must be absolute https URLs, at most 2048 characters, with no
username or password, whitespace or backslashes, and their origin must
exactly match one of your return URL domains. This is what stops Laces
checkout being used as an open redirect.The one exception is local development: http://localhost:<port> and
http://127.0.0.1:<port> return URLs work, end to end, when you have
registered that exact origin in Return URL domains. See
Local development domains.
Put the literal placeholder {CHECKOUT_SESSION_ID} anywhere in
on_success_url, and Laces substitutes the real id:
https://shop.example.com/thanks/{CHECKOUT_SESSION_ID}. The URL-encoded
form %7BCHECKOUT_SESSION_ID%7D works too, so a URL built with
new URL() or encodeURIComponent is fine.
With no placeholder, Laces adds session_id=LCSCS-… as a query
parameter (replacing any session_id you already had there).
Never fulfil an order on the browser’s word alone. A redirect to your
success page, or an onSuccess callback in the page, is user experience,
not proof of payment. Anyone can type your success URL. Before you mark
anything paid, confirm it on your server: read the session with
GET /checkout-sessions/{id}
and require status: "complete", or act on a signed
order.paid webhook.
On your success page’s route, read the session with a bearer token:
// GET /thanks?session=LCSCS-...app.get("/thanks", async (req, res) => { const sessionId = String(req.query.session || ""); const token = await getLacesToken(); // cached; see Authentication const r = await fetch( `${BASE}/checkout-sessions/${encodeURIComponent(sessionId)}`, { headers: { Authorization: `Bearer ${token}` } }, ); if (!r.ok) return res.status(400).send("We couldn't verify your payment."); const { data } = await r.json(); const cart = await currentCart(req); // the buyer's cart, from your own session cookie if (!cart || data.client_reference_id !== cart.id) { return res.status(400).send("This payment doesn't belong to your cart."); } if (data.status !== "complete" || data.order?.status !== "paid") { return res.send("Your payment isn't complete yet. We'll email you when it is."); } await fulfil(cart, data.order); // idempotent: the webhook may get here first res.send(`You're registered. Order ${data.order.code}.`);});
@app.get("/thanks")def thanks(): session_id = request.args.get("session", "") r = requests.get( f"{BASE}/checkout-sessions/{quote(session_id, safe='')}", headers={"Authorization": f"Bearer {get_laces_token()}"}, timeout=30, ) if not r.ok: return "We couldn't verify your payment.", 400 data = r.json()["data"] cart = current_cart() # the buyer's cart, from your own session cookie if not cart or data["client_reference_id"] != cart.id: return "This payment doesn't belong to your cart.", 400 if data["status"] != "complete" or (data["order"] or {}).get("status") != "paid": return "Your payment isn't complete yet. We'll email you when it is." fulfil(cart, data["order"]) # idempotent return f"You're registered. Order {data['order']['code']}."
Not paid yet and not expired. order is null until the buyer starts a cart.
complete
The linked order is paid. It stays complete if the order is later refunded, and after the 24 hours.
expired
24 hours passed without a paid order
order is the most recent order made through the session, so a buyer who
retries after a failed payment shows their latest attempt. Expired sessions
are deleted automatically some time after they expire, after which a read
returns 404 not_found, so verify promptly and keep your own record.Always send client_reference_id (your cart id) when you create the session,
and check it on return. That stops a session id from someone else’s purchase
being replayed against your buyer’s cart. If you create sessions from your
server, also store the returned session id with the cart.
The redirect can be lost: the buyer closes the tab, or their connection
drops. Subscribe to the order.paid webhook as well, and
match it to your cart with attribution.checkout_session_id. Fulfil on
whichever arrives first, idempotently.
event_id missing, or prefill / client_reference_id invalid
400
invalid_return_url
Fix the URL, or add its origin to Return URL domains
401
invalid_key
The publishable key is wrong, replaced by Regenerate keys, or revoked
403
origin_not_allowed
Add this page’s exact origin to Allowed domains
403
payments_disabled
Your organization isn’t cleared to take payments yet. Hide the button (check payments_enabled on the event first).
404
not_found
The event isn’t yours, or is a demo or code-locked event
409
sale_closed
Registration isn’t open. Show “Registration closed”.
429
rate_limited
Wait the seconds in Retry-After, then let the buyer try again
A session is never created for an organization that can’t sell, so a buyer is
never sent to a checkout page that can’t take their money. Read
payments_enabled from GET /events/{eventId}
to decide whether to show the button at all.