Get your keys, list your events and complete a real registration through Laces checkout in about ten minutes.
By the end of this page you’ll have fetched your organization’s events from
your terminal, sent yourself through a Laces checkout and verified the result
the way your server will.You need: owner or admin access to a Laces organization, a terminal with
curl, and a website you control on https to come back to (any page will
do, for example https://shop.example.com).
The Partner API has one environment: production. This walkthrough takes a
real registration. Use a free or low-price ticket on an unlisted test
event, and refund it afterwards. See
Testing your integration.
Every key, token and id on this site is a made-up example value. Your real
keys are issued to you in the Laces app, under Settings → Developers.
1
Create a test event (2 minutes)
In the Laces app, create an event to test with: set its visibility to
unlisted so it stays off the public listings, open registration, and
add a free ticket type (or one at the lowest price you’re happy to pay and
refund). Your organization must be cleared to take payments for paid
tickets.
2
Get your keys (2 minutes)
In the Laces app: Settings → Developers → Create API key.
A 401 invalid_client means the id or secret is wrong (check for a missing
character or changed case). A 401 partner_credential_not_accepted means
you called a host other than connect.laces.run. See
Authentication.
An empty list means your organization has no event that is open or
scheduled, public or unlisted, and not yet ended.
payments_enabled: false means your organization isn’t cleared to take
payments yet, so checkout will be refused with payments_disabled.
5
Start a checkout (2 minutes)
Create a hosted checkout session. Your server would make this call; here
it’s curl:
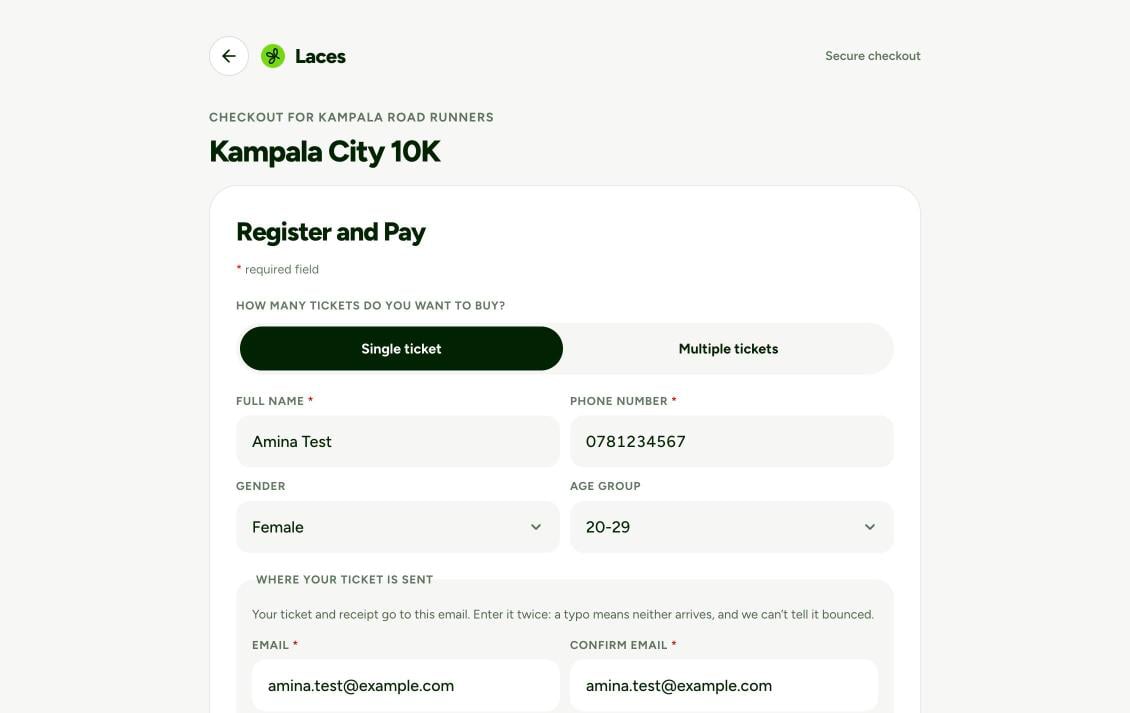
Open data.url in your browser, register with your own details, and pay
with mobile money (or confirm, for a free ticket). Laces sends you back to
https://shop.example.com/?session=LCSCS-….
The Laces checkout page that data.url opens, labelled with your organization's name.
400 invalid_return_url? The URL’s origin isn’t in Return URL domains
exactly as typed (scheme, host and port).
status: "complete" with order.status: "paid" means the registration is
paid. That’s a working checkout. If you paid for it, refund it from the
Laces app.
Never fulfil an order on the browser’s word alone. A redirect to your
success page, or an onSuccess callback in the page, is user experience,
not proof of payment. Anyone can type your success URL. Before you mark
anything paid, confirm it on your server: read the session with
GET /checkout-sessions/{id}
and require status: "complete", or act on a signed
order.paid webhook.